
With so much core functionality, as well as likely the biggest eco-system for integrations and extensions, it’s easy to see why Magento is so popular – however, one of the biggest weaknesses of the platform has historically been content management – particularly for brands and higher-end retailers focused on content.
The content management capabilities in Magento 1.x versions were pretty uninspiring – the WYSIWYG editor didn’t allow for great control and Magento’s widgets and blocks have never been a good fit for eCommerce teams, in my experience. With these limitations, a lot of merchants opted to create a hybrid solution – most commonly using CMS platforms like Drupal or WordPress. Paul Smith was a good example of a larger retailer that used a combination of Drupal and Magento when they were on Magento 1 and there are thousands that use WordPress. However, back in these days, platforms weren’t built to work together like they are today (due to lots of progression around APIs in both areas and a general shift towards headless), so this rarely worked well.
With all of this in mind and with other competitors investing in content management (such as SAP Hybris and Shopware) and growth around content-native platforms (such as Episerver and Sitecore), it was obvious that Magento 2 needed to address CMS. Although it took a long time to arrive (after Magento acquired GeneCommerce’s Bluefoot extension in 2016), Magento officially released Page Builder (as part of the 2.3.1 release) earlier this year, which represents a considerable improvement on all aspects of content management previously allowed for in the platform.
Although it’s still very new, Page Builder eliminates the need for spending hours trying to put together basic landing pages, or a product page that incorporates a video and a size chart, for example. With the introduction of Page Builder, Magento has at least addressed a significant issue that had caused headaches for retailers, marketing teams and developers for quite some time.
What is Magento Page Builder?
Page Builder is a built-in, drag-and-drop style content management solution, which has been factored into the core of Magento Commerce. The demand for drag-and-drop content management tools has been growing in popularity for a few years now, so it was almost inevitable that Magento would follow this pattern and build a tool that enabled non-technical users to quickly and easily build content pages and manage key content elements on other templates. Although very few of the direct Magento competitors have a solid out-of-the-box CMS, Salesforce are due to release their Page Designer solution soon, SAP has a CMS cockpit and Shopify and BigCommerce have Shogun (a third-party add-on), so this was a needed addition.
Now, instead of the very basic WYSIWYG editor and widgets / blocks that were built into earlier versions of Magento, Page Builder offers a fast and intuitive interface for building product and category content and full content pages. The admin user can simply drag content type elements to the desired position on the page, and then add the relevant content to them. Developers can additionally build out page builder components based on the user’s requirements, such as a NOSTO recommendations block or an interactive image for example. Users can also add custom content via HTML.
Creating Content with Page Builder
Building content pages with Magento’s Page Builder is really straightforward. If you’re editing a product, page or category, you will see a button labelled ‘content’. Once you click on content, a menu slides out to offer all of the content related functionality, as can be seen below.
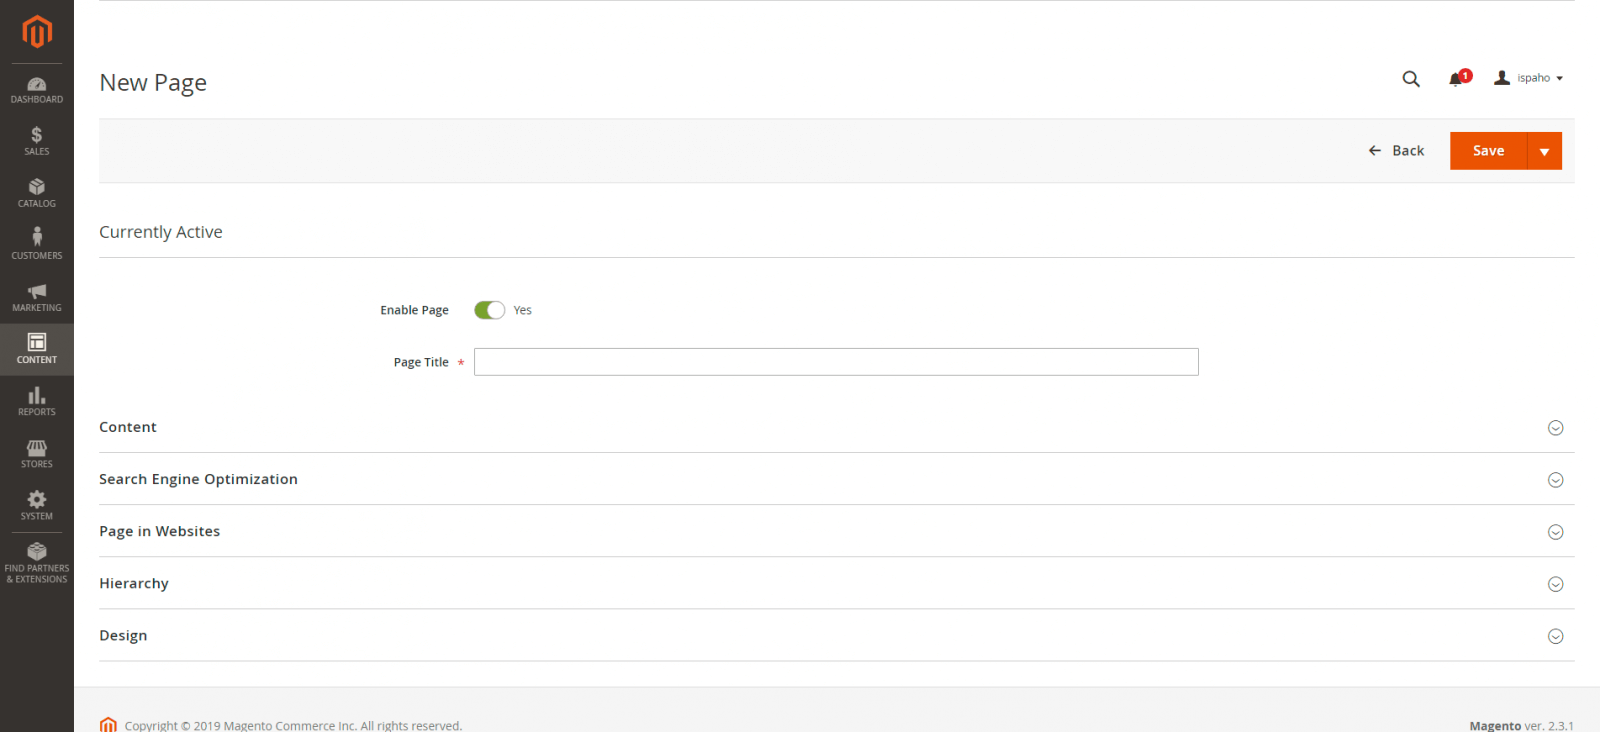
If you’re creating a new page you’ll need to save it before you can start editing content using Page Builder.
Since the field labelled ‘Content Heading’ will appear on the page as an H1 header (by default anyway) before any other content, you may choose to leave this field blank and add headers where you need them using the Page Builder Header content type.
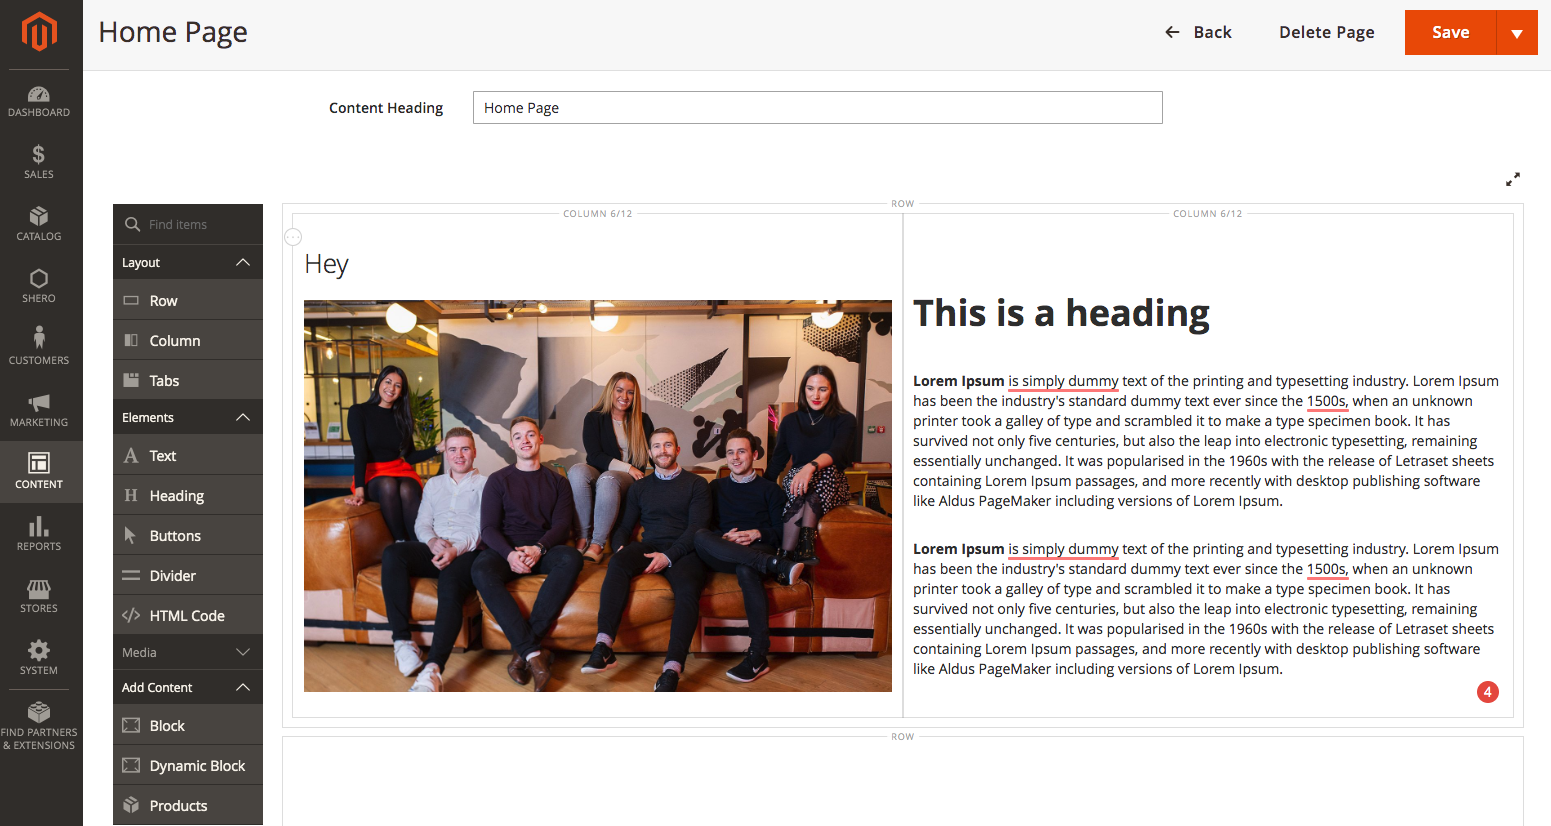
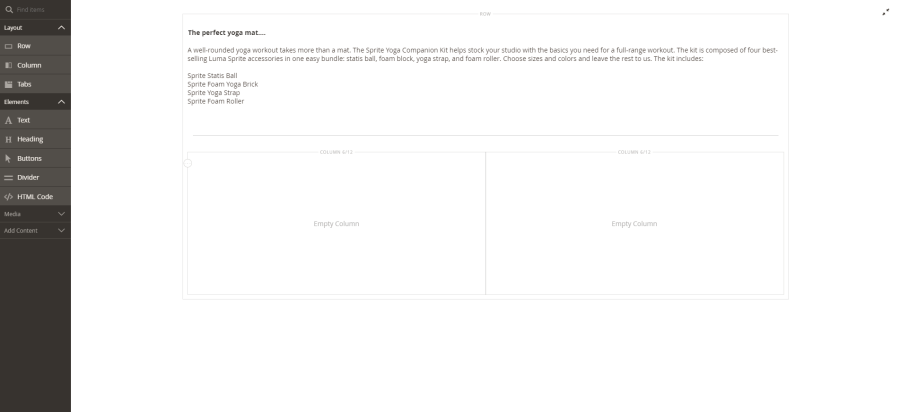
It’s super easy to add rows and columns and resize them in Page Builder, which is a big plus for non-technical users. The admin interface works on a 12-column grid, so you have the flexibility to design pages as you wish. Simply drag and drop a row onto the main canvas, then move columns onto that row. From there, you can drag the sides of the columns to resize, with the other column resizing automatically to fill the row.
Whilst columns provide the framework for managing content – there are a number of native types of content available by default, which has been divided into three groups: elements, media and pre-existing content. Examples of standard “elements” available include text, headings, buttons, divider lines and HTML code snippets. The media section includes placeholders for images, video, banners, sliders and maps. Finally, the “add content” section allows the user to add static content blocks, dynamic blocks and products from the catalog.
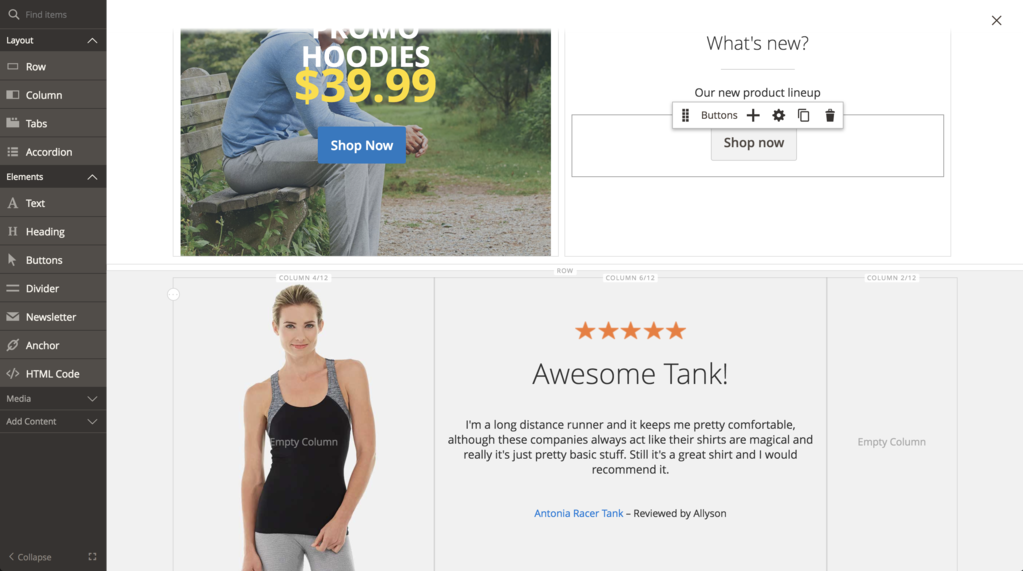
All of these components can be activated by dragging and dropping them into the required position, and then clicking on the settings icon for that element – this will then allow for formatting and layout changes, as well as things like uploading media or adding content etc. Each content type element has its own set of fields and permitted settings.
Once you’ve finished creating the content in Page Builder, all that remains is to press the orange Save button in the top right corner. The page can then be previewed to see exactly how it will appear as part of the store. In addition this, users are also able to schedule content changes (would need to be managed as a scheduled update) and page builder can also be used alongside Commerce features such as customer segmentation and content staging and preview.
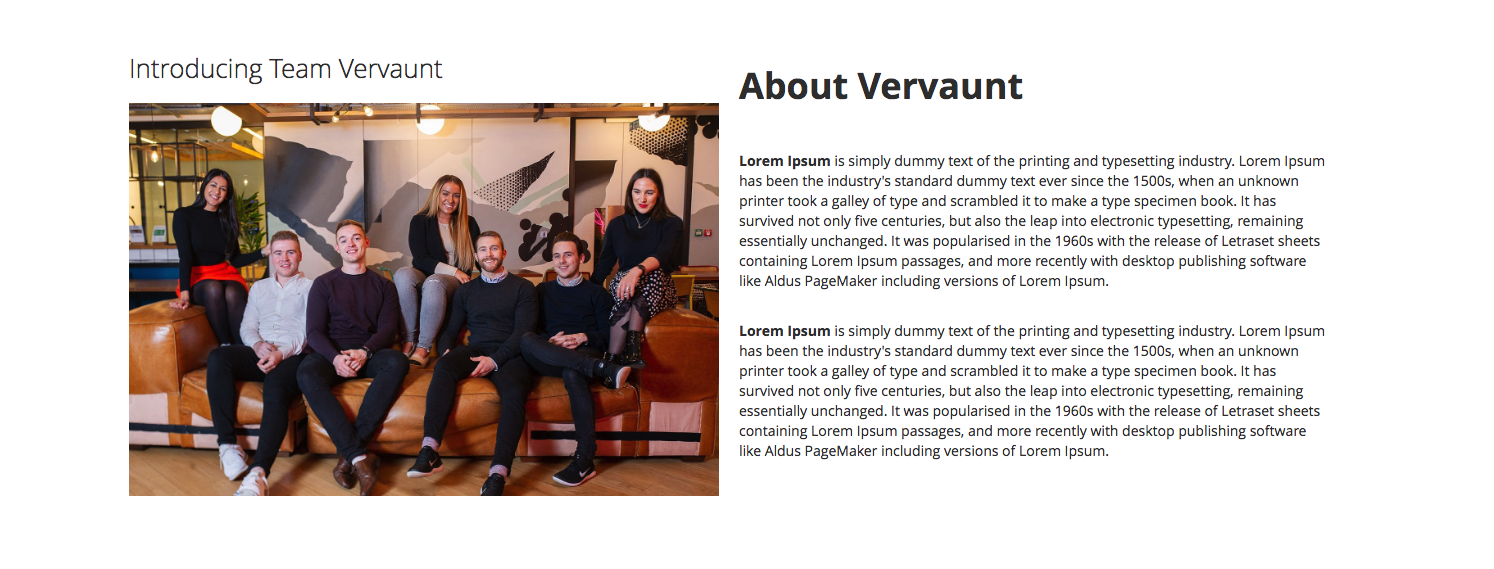
The above screenshot is what the two columns I built as the example looked like on the front-end (without changing any padding etc). This is a very simple example, but it should how straightforward the process is.
Using Products in Page Builder
Page Builder has a built-in relationship with product recommendations – allow you to create rule-based sets of products within a page or content area. The rule-based logic makes choosing the products to display much easier and there are various options for how to lay out the products as well.
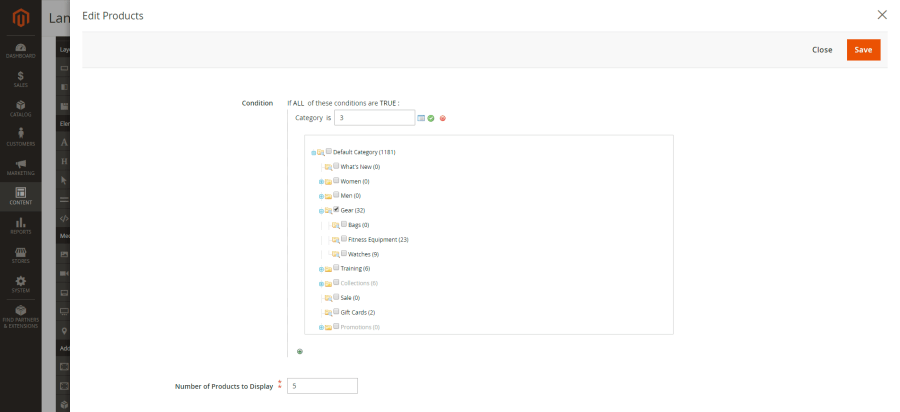
A lot of Magento users tend to use a third party solution to manage product recommendations (such as NOSTO or Monetate), which would need to be added into a HTML block or developed as a separate element.
Scheduling Content Updates
As mentioned previously, with Page Builder users can also schedule content updates for future dates (combined with the commerce content scheduling functionality). It’s also possible to add a scheduled update to landing page to change images, which will only be put live on the scheduled date. This is a great feature that will offer a lot of benefit for the end user – allowing staff to take a proactive approach to content management, rather than constantly trying to catch up with the demands from marketing and product teams.
To schedule an update, it’s as simple as clicking on the Schedule New Update button in the top right of the page edit screen. This will display an overlay with the standard fields, with a few extra options. Those extra fields allow the user to name the update, add a description in order to record why the update was applied and to specify a start date for the update, and optionally, an end date for it also.
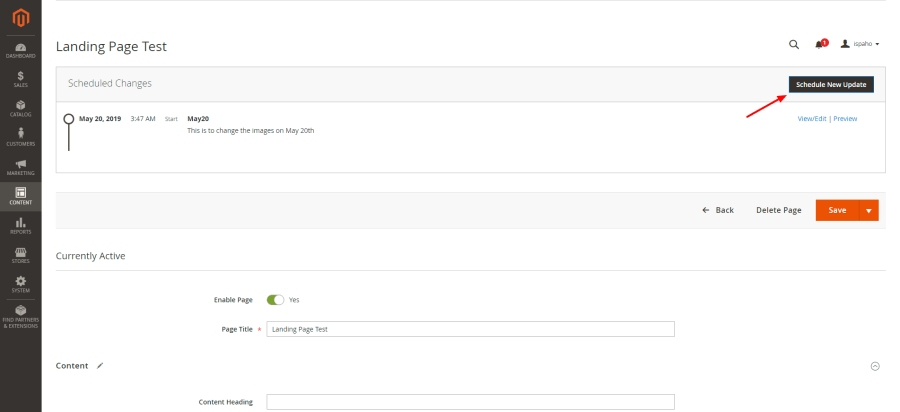
After these fields have been completed, the rest of the page looks the same as the standard page edit screen, and the Page Builder works in exactly the same way as described above. Any scheduled updates applied will then be displayed at the top of the page edit screen, so that it is clearly visible to anyone working on the page.
Product and Category Editing
When adding or editing products or categories in Magento 2.3.x, users are offered the choice of working with the old-style WYSIWYG editor, which makes use of TinyMCE, or switching to the new Page Builder editor.
If the user chooses to switch to Page Builder, they are presented with a full-screen editing area, with the same Page Builder menu on the left hand side. From there a user can manage the contents of the area in the same way, with the same options.
Although it may not be used as frequently as for landing pages, it’s useful to have page builder for these page types as it provides a much easier way to manage rich media on product pages, in particular. If a user wanted to add a banner or detailed content area to a PDP, they’re able to do so if page builder is used in that area of the page.
Extending Page Builder
For me, the best thing about Page Builder is that developers are able to extend it’s functionality and add new components, which could be anything from a NOSTO recommendations block, a specifically styled type of content area, a form or even an interactive image or video. Developers are able to either edit existing content types or add new ones. Given that Page Builder isn’t a fully-fledged enterprise CMS, this is a big plus for merchants looking to manage a lot of (and advanced) content.
Conclusion
Although Page Builder isn’t an enterprise CMS, it is a step in the right direction and it represents a reliable, intuitive means of delivering content that doesn’t require developers or take hours of painstaking effort.
What was once a real pain point for Magento retailers has now become a straightforward part of operations and the ability to extend componenents is great for both developers and end users to build out usage.
Over time, I definitely expect to see new functionality introduced alongside Page Builder, with things like more control over mobile experience, full version control, approval workflows, more advanced content building features and
